
Sometimes you’ll see something, maybe on Pinterest, or a website, or maybe even in the shop of a window. Initially you’ll think ‘oh man, that would be perfect’ maybe for a Christmas gift or maybe you just want to treat your self. Then you look at the price tag and after a few minutes thinking ‘ Seriously, it’s that much?’ you start to wonder if you could make it yourself. That’s the beauty of upcycling, taking something that people wouldn’t think about reusing and turning it into something awesome! Thanks to KPWB’ s Pinterest and http://366daysofpinterest.com, you can learn how to upcycle a bottle into a glass you don’t have to pay $20 dollars for.
Step 1. Gather your supplies

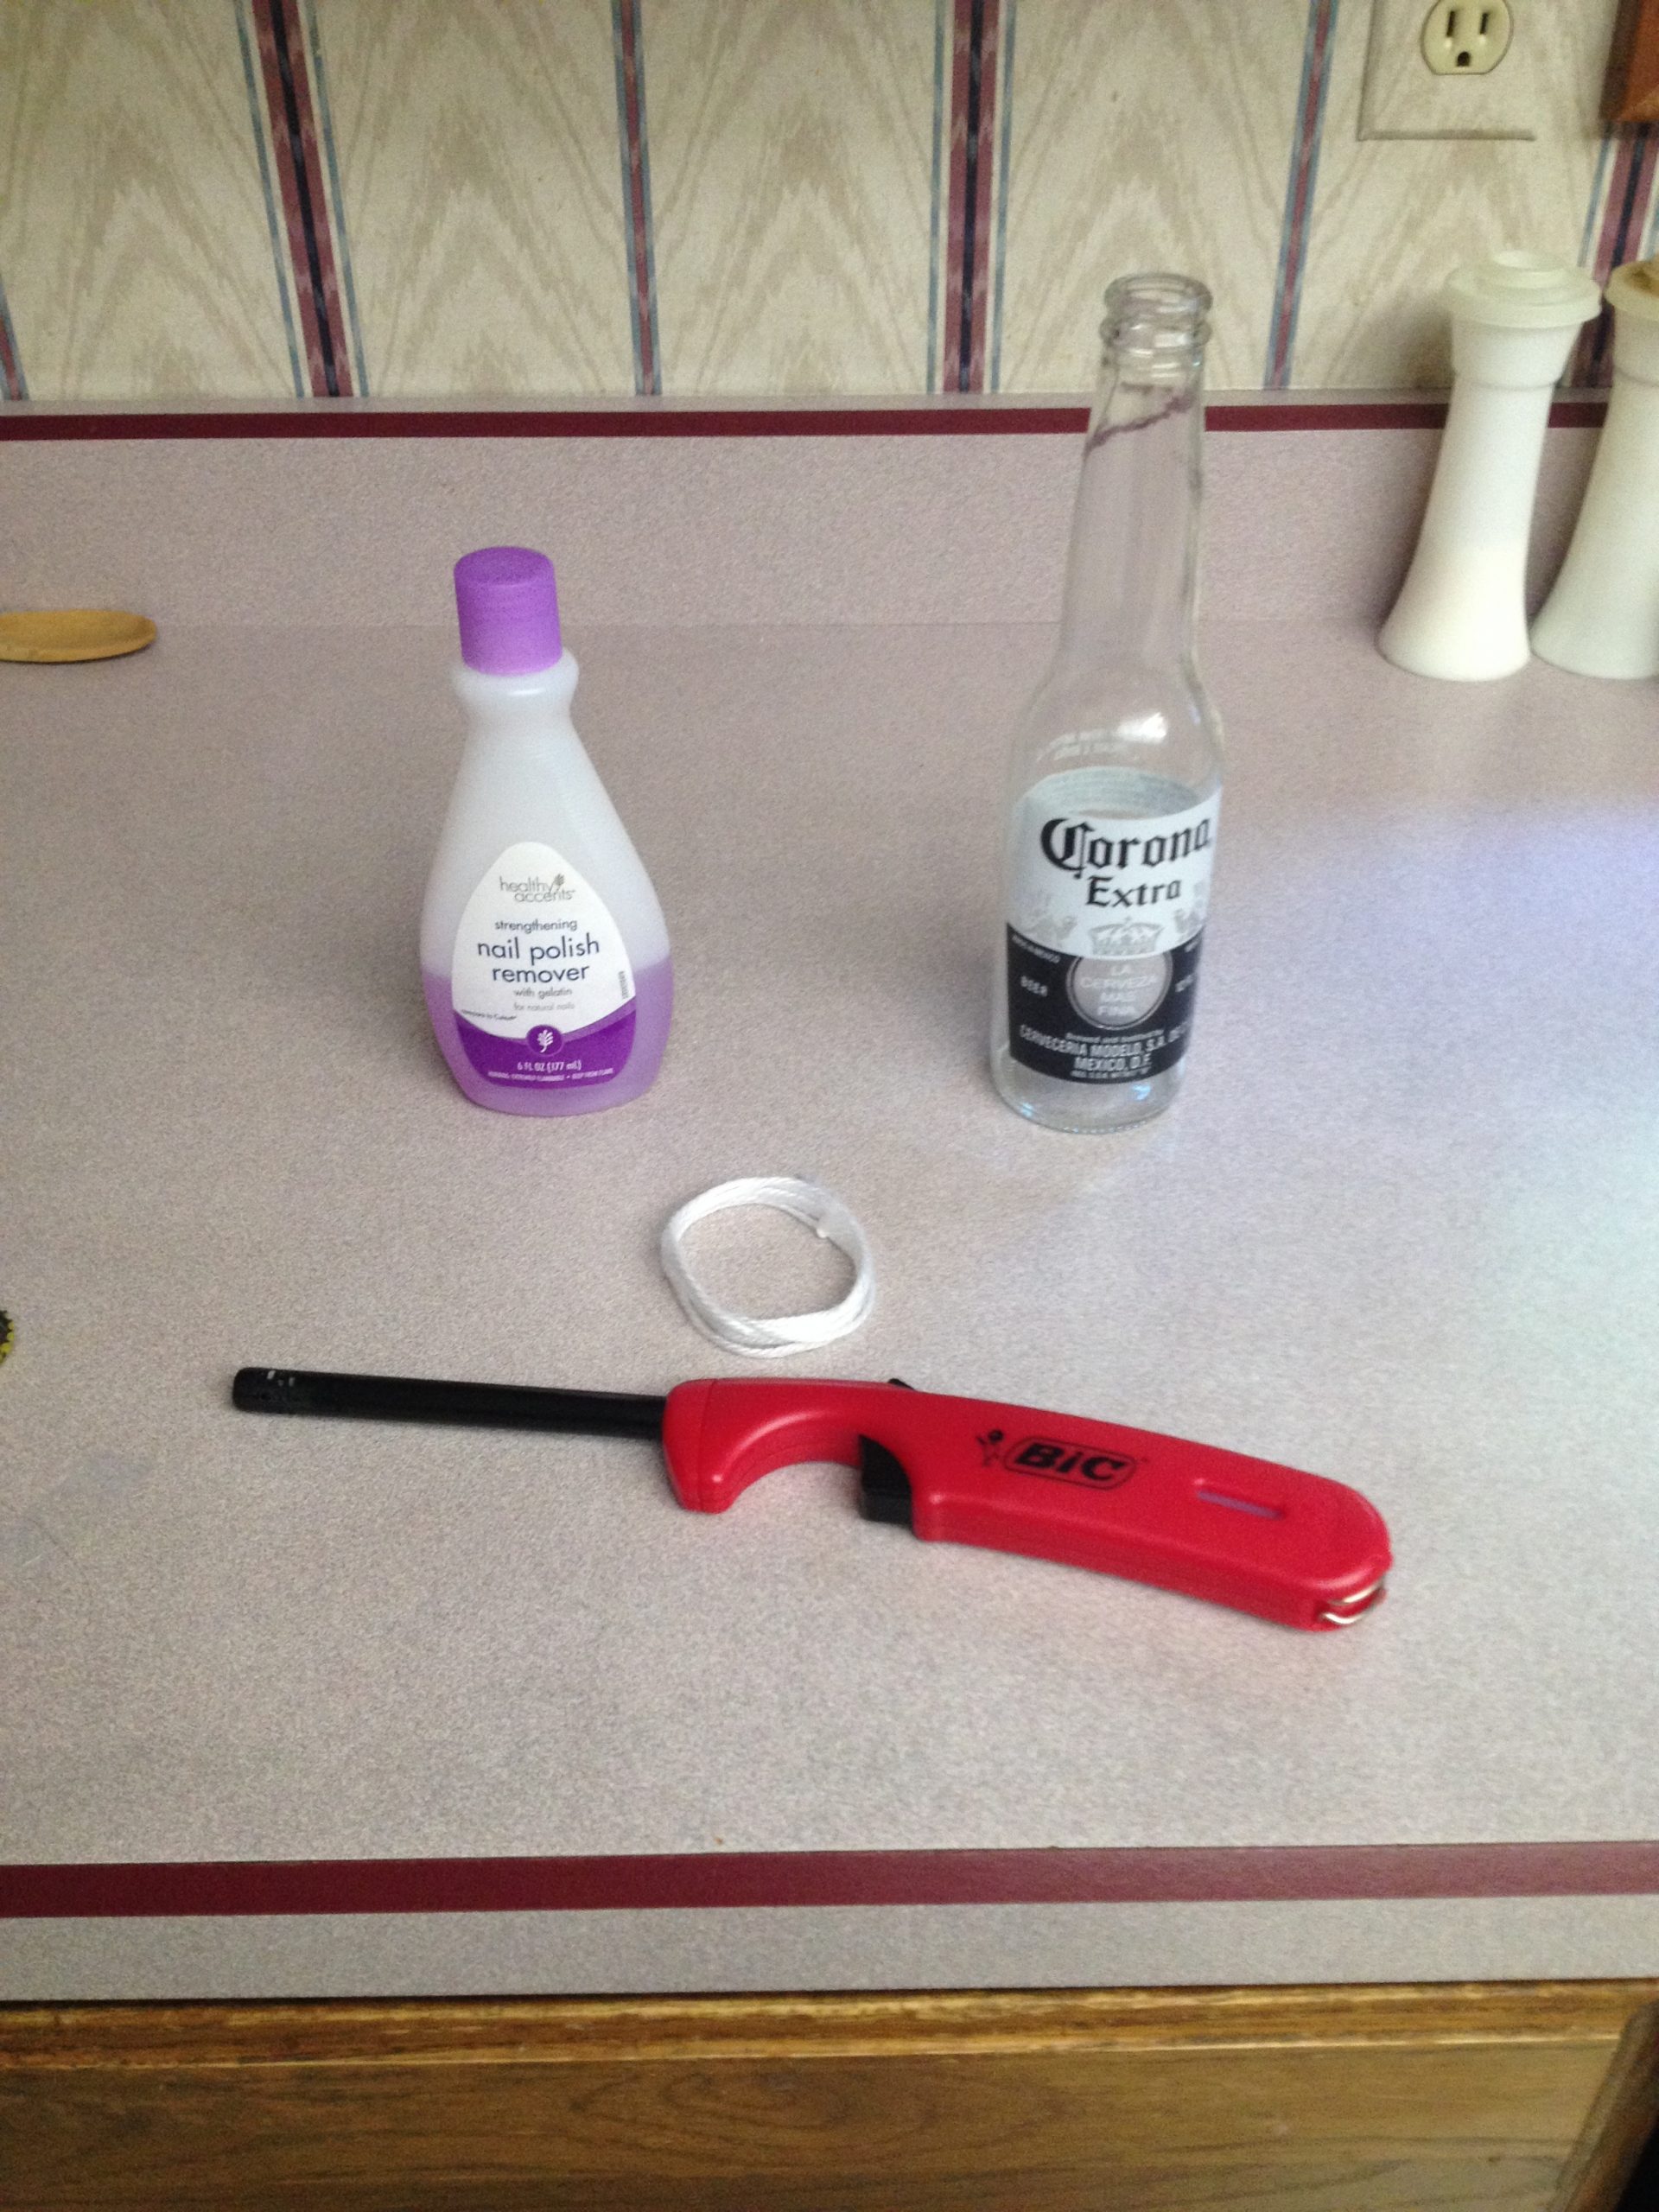
Everything you need for this project you should be able to find around the house pretty easily.
- A glass bottle (The author would suggest that you use a bottle with a label that won’t peel off like a Corona.)
- Yarn
- Nail Polish remover
- A lighter (The author would strongly recommend a long reach lighter.)
- A sink full of cold water
- Sandpaper
Step 2. Measure your yarn

Tightly wrap your yarn below the neck of the bottle around six times before tying off the ends.
Step 3. Soak yarn in nail polish remover

Fill the bottom of a small bowl with the nail polish remover and soak the yarn till it’s saturated. Position the yarn back on the bottle exactly where you want it cut.
Step 4. Light up the bottle

Before you do this step, the author strongly cautions that you clean up any excess nail polish from the bottle. Once that’s done, hold the bottle sideways by the neck over the sink and light the yarn on fire.
Step 5. Rotate the bottle

While holding the bottle, rotate it so that the fire heats the bottle evenly. Do it for around thirty seconds before placing it in the ice water. Once you do that, the pieces of the bottle will separate.

Step 6. Sandpaper and admire your work

Dry off the lower half of the bottle and gently sand the top of the glass to fix up the edges. After that, sit back and enjoy a drink from your new glass!
Final Thoughts:
The author has honestly wanted to do this project for a long time. However, if you are thinking about doing this, there are some things to think about. For instance, the author suggests using 366daysofpinterest.com’s idea and braid the yarn instead of wrapping it around the bottle. The author has a feeling that if she’d done that, it might have around the bottle better rather than it moving up the bottle. Also, timing is important when doing a project like this. When doing this, the author waited until the flames died out because she thought she counted too quickly. This caused the bottle to crack all over, making it useless. Other then that the author definitely recommends doing this project.
http://366daysofpinterest.com/2012/04/03/day-63-diy-corona-glasses/
https://www.pinterest.com/KeepPWBeautiful/


